
Photos occupy a huge role in the reports of modern home inspection. We all know how to use the camera and here for the home inspection photo takes a major role in the inspection and it tells the best story about the problem and works you as a home inspector did. Some clients expect to see each detail of our work and they ask us to take everywhere we go for inspection. It is sometimes okay with the free space when we go to the rooftop and do the minute inspection we may not able to handle the balance and answer to the clients in detail. So the better way is to take the photo clearly and explain them later. It also helps to get the easy report or details of the customers after years back if they contact you for the inspection. There are 3 most important shots that every home inspector needs to know about. Those shots are explained briefly here.
Camera tricks that home inspector should learn:
The photos are the basic and excellent tool to do communicate with the clients, in some areas they will never accept that the damage until they see it in real. So in that case these photos are very helpful to the home inspector to easily make them understand the damage or importance of repairing it. Those 3 major shots are
- Overviewed shots
- Closeup shots
- Orientation shots
Other than these many other shots are there to explain but this helps the home inspector easily and clearly. Let us discuss each of these shots,
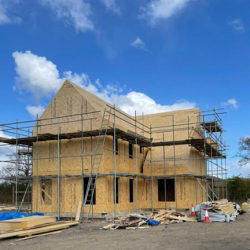
Overviewed shots – The full size of the home is named as the overview shots and this helps to look at the full image of the house you work for. You have to take the shots of areas in the house into a large size photo. The areas like
- Home
- Basements
- Crawlspaces
- Attics
- Roof
- Compound walls
- Garages
- Etc
Closeup shots – This helps the home inspector to check the details. Many of the inspectors are making mistakes by taking the closeup photos by not making it as very closely. You have to take the picture very close so that it helps to read the details. If the photo is not very close then the picture has to zoom in and that does not give a clear image to read the details.

Orientation shots- Close up photos describes where the details of the area very clearly but still many clients want to know where that closeup shot comes from so it is important to take the orientation shot attached with that closeup shot says the full details of the area that had been affected and this refers the complete image of the work. No other detailed sketches or words are needed for this particular part.
So, by working with these very hard and detail the full image with each detail can get through this home inspections. This also helps the inspector to work with the same client in the future.